How It Works For Schedulers
Main Features
Once you have created your account, you can start scheduling appointments for a designated Book Fair:
- Import the list of customers you wish to meet (with an Excel spreadsheet or manually).
- Just push a button and the website will send email appointment requests to your customers.
- Through the personal and direct link provided in the email, customers access your live-updated schedule, where they can see available slots. Customers only need to click on the suitable slot to confirm the appointment. Both scheduler and attendee receive email confirmations
Your Book Fair schedule fills up without any effort! Both schedulers and attendees save time and avoid scheduling mistakes.
The website is conceived so that it is as simple as possible for attendees to confirm appointments : automatic log-in, clear and minimal interface, email confirmations.
Of course LaBase RendezVous is fully secure and keeps your data confidential: details of appointments are only accessible by each personal account. Attendees can only see whether schedulers are available or not.
Advanced Features
- Manage your schedule easily : days, times, blocked slots. Define VIP customers that have access to VIP-only slots
- Manage your customer list : import customers on-the-fly, set up VIP customers, custom durations of appointments.
- If someone else is in charge of appointments scheduling, you can set up delegates, both for schedulers and attendees. Works for co-agents.
- Cancel or re-schedule appointments with a few clicks.
- Chase appointment requests that haven’t been scheduled yet.
- Export your schedule to Excel.
- Works for Teams : shared appointments, shared schedules, shared lists of customers.
- Works both for Rights Sellers and Buyers (Schedulers are typically Rights Sellers in our Publishing Industry).
Account Set Up
Login and Password
Scheduler Accounts are set up by us. Your login is your email address and we will provide you with a password.
Multiple Sessions
Our site uses cookies and is browser-authenticated, so that you can only open one session per browser. Should you use several sessions (e.g. if you organise schedules for several people in your team), open sessions in different browsers.
Compatible Browsers
The site is being tested in recent versions of Chrome, Firefox, Safari and Opera, which are the browsers we recommend. LaBase RendezVous is responsive and can be accessed through mobile devices, although some schedulers' functions will not display well on smaller sizes devices such as mobile phones.
Scheduler Navigation
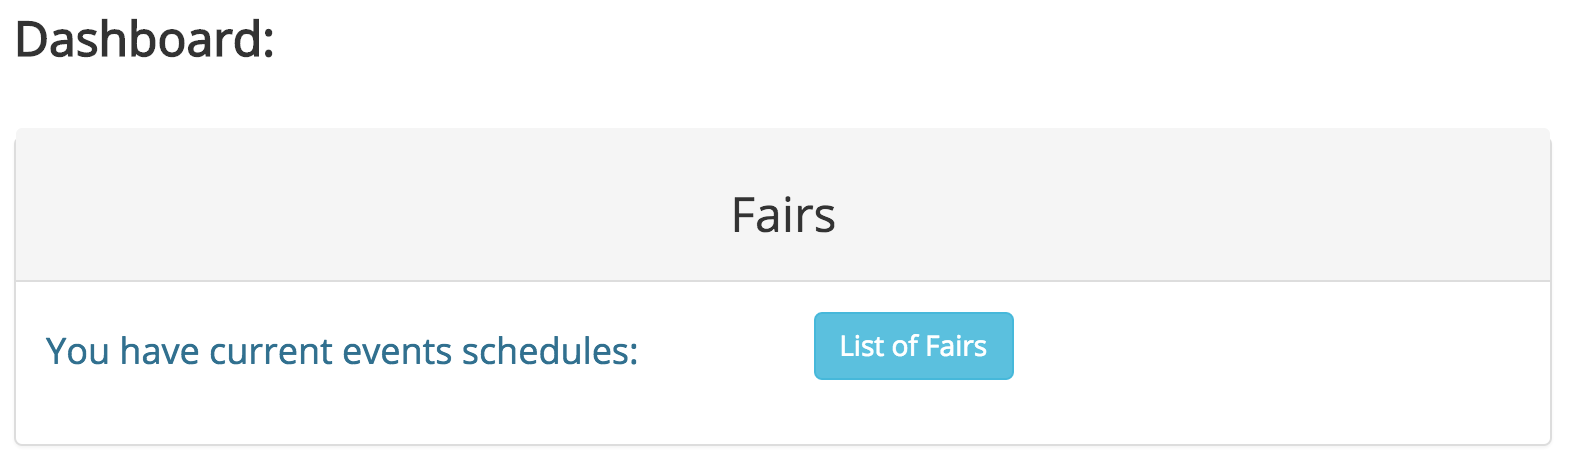
To view current fairs, from your dashboard page (once logged in), click on ‘List of Fairs’.
Scheduler can add new events from the existing list of events (button ‘Add Event’), or select an already added fair.

[ Feature in development: create custom events ]
Once the fair has been added, your main 2 views are:
- View Schedule: this is your fair schedule with free slots, blocked slots and confirmed appointments
- Customer Selection: this is where you import customers and send appointment requests

Edit your event settings
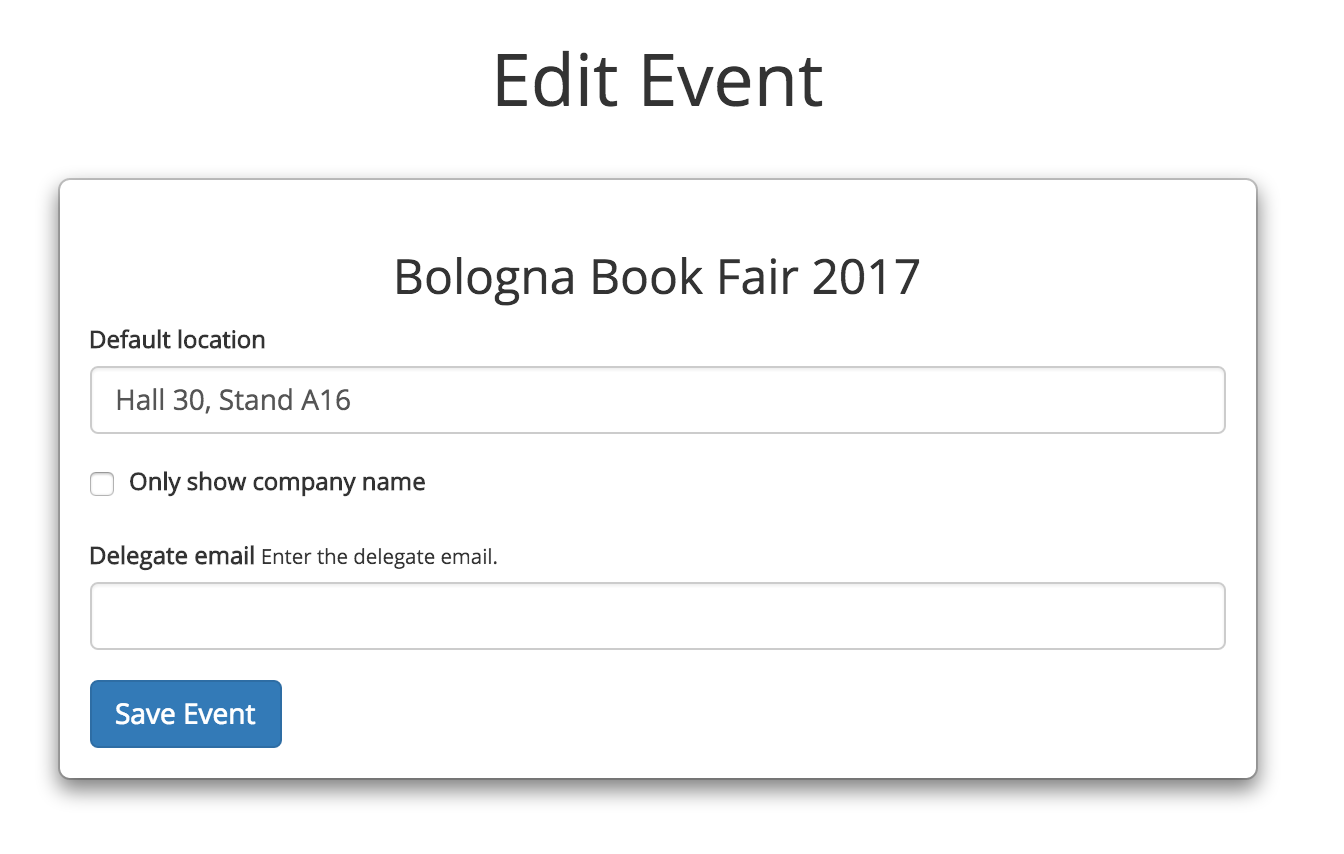
On your dashboard page, click on 'Edit Event' on the relevant line:

On this 'Edit Event' page, you can:
- Enter your default appointment location. This typically is your own stand/booth. This will show up on the email invitations and when the attendee connects to your schedule, so this is very important!
- Define a Delegate Scheduler (by entering her email address): if there is one, all email confirmations will go to the Delegate Scheduler rather than the scheduler.
- Force all communication to Attendees to only show Company Name. This is particularly useful if you Shared Schedules with several members of the same team.
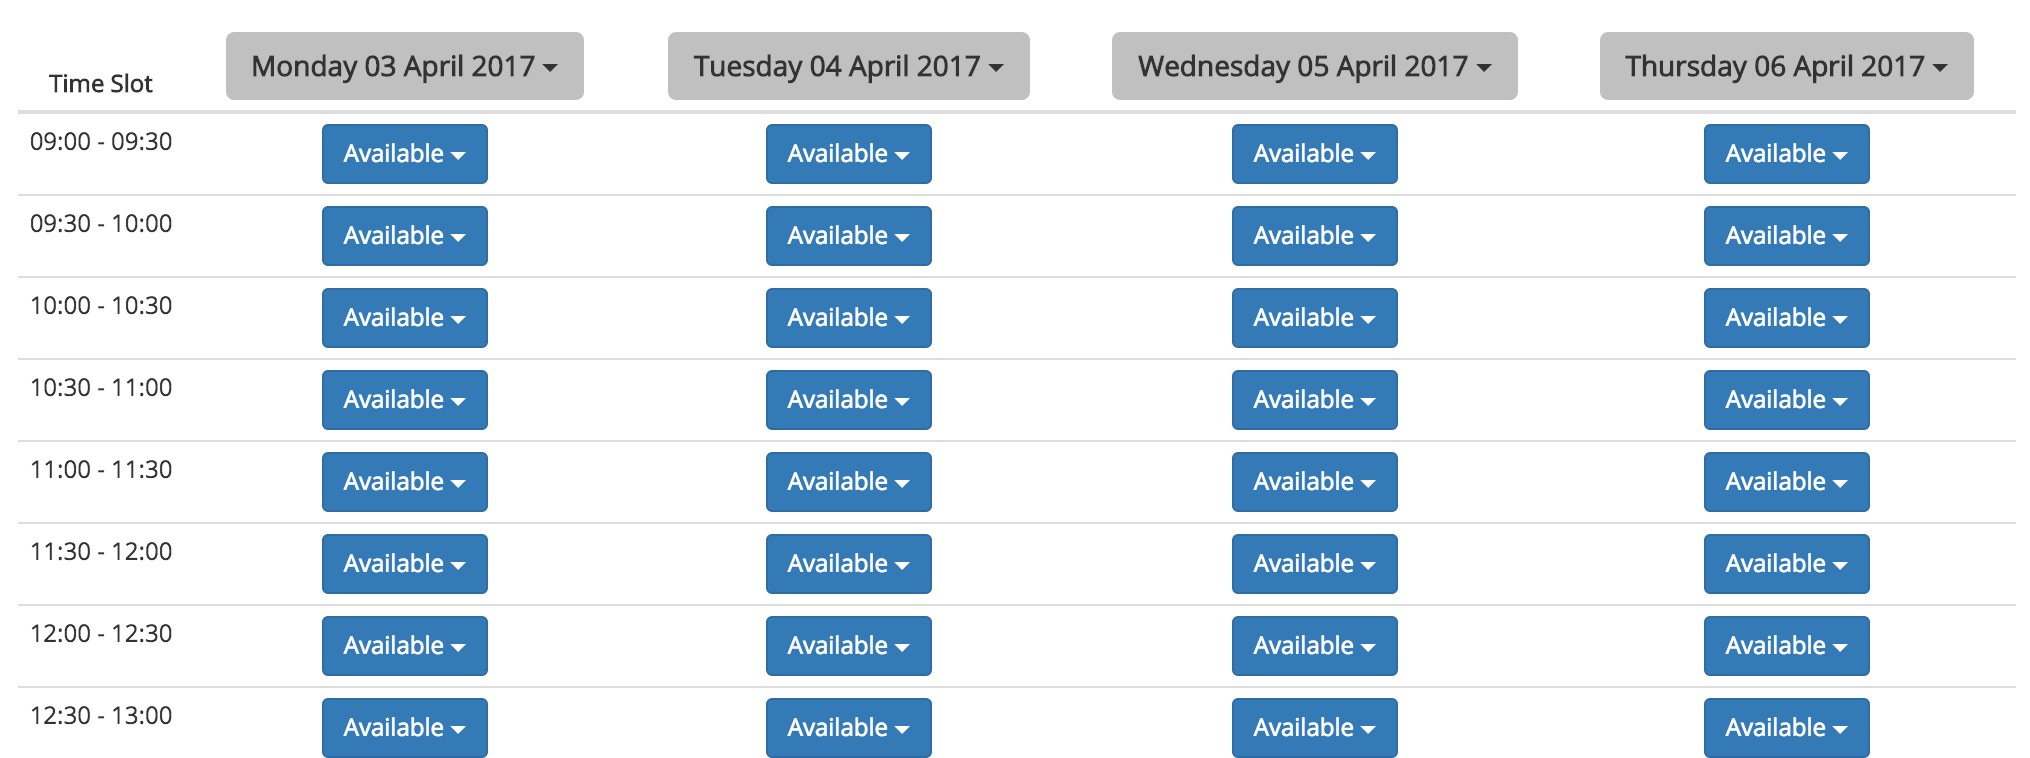
Edit your schedule
This view shows each day of the event, and all slots for each day.
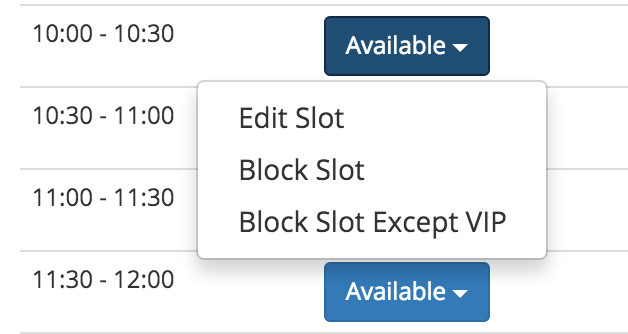
Modify A Slot from the View Schedule Screen
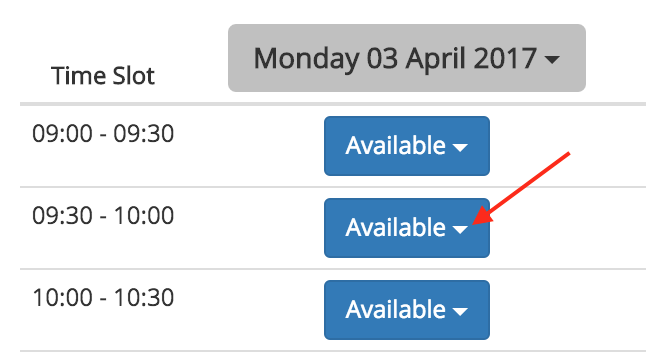
If you click on the arrow on a slot, you can:
- Block the slot: customers will see this slot as 'Booked'.
- Free the slot: if it is blocked or booked.
- Block the slot except VIP: the slot will appear 'Booked' for all customers, except the ones you have selected as 'VIP' (see below for VIP Status)
- Edit Slot: this will take you to a more detailed screen, see below.
Edit A Slot (detailed screen)
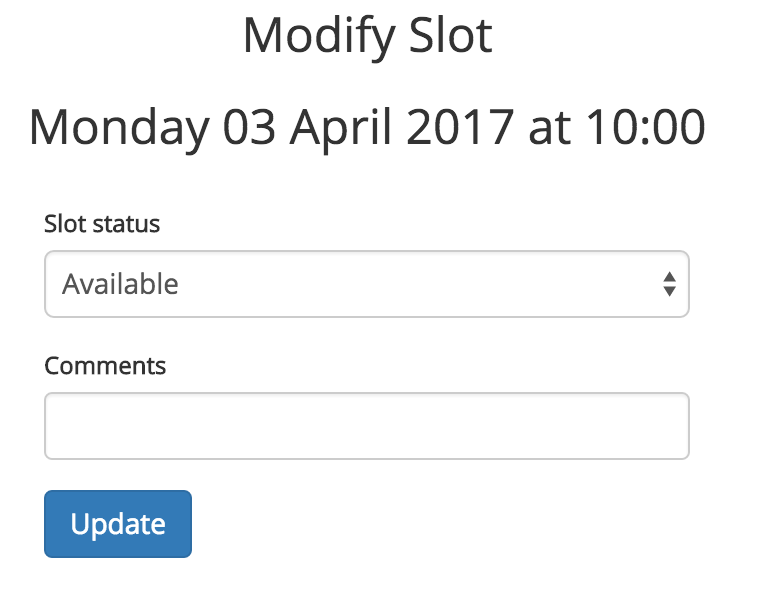
The status of the slot can be also modified here to 'Blocked', 'Blocked except VIP' or 'Available'.
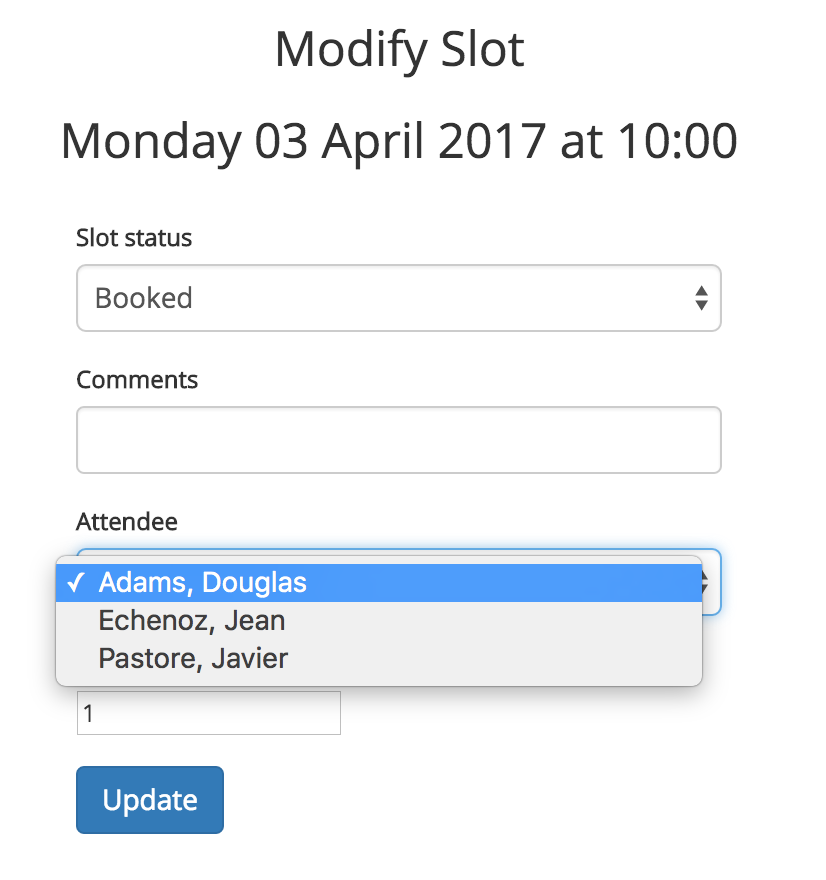
You can also manually set up an appointment by selecting 'Booked' status.
When you you select 'Booked', a field will appear, and you can select the person with whom you have an appointment for this slot. The list comes from your Customer Selection.
If the person is not in your Customer Selection, click on the 'Add New Customer' green button, and follow the instructions.
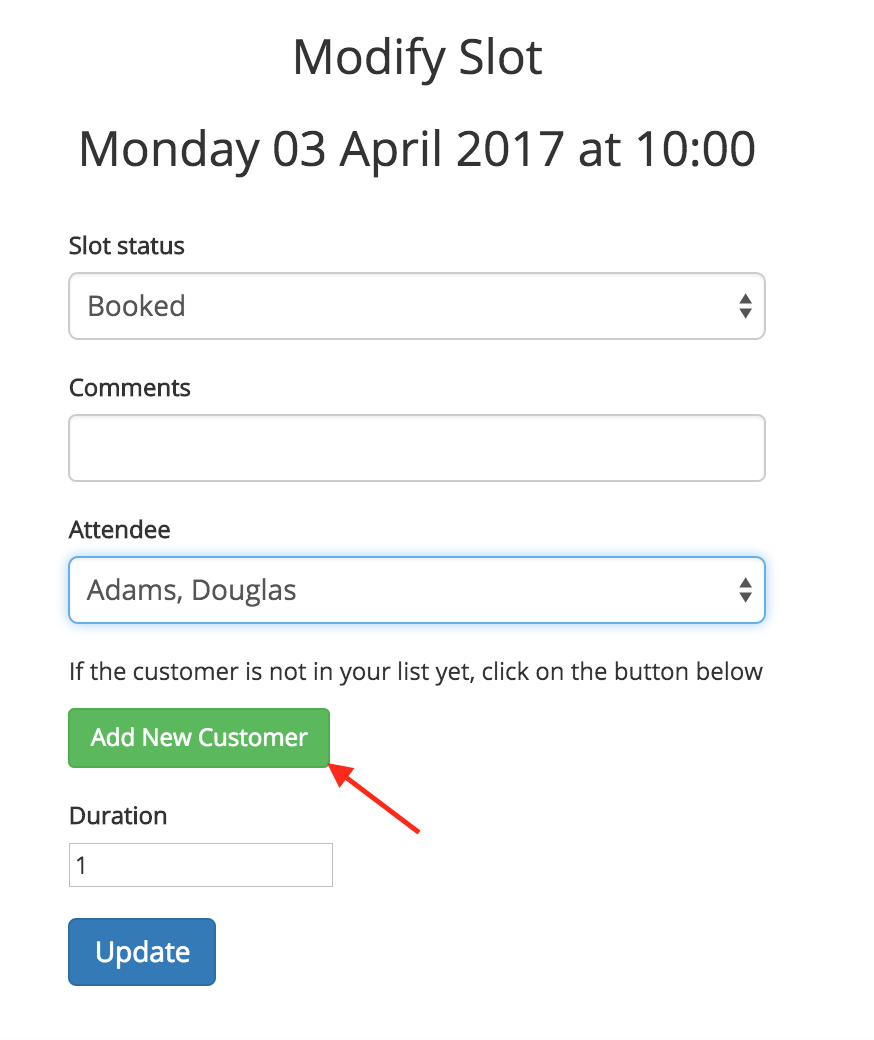
Please note that:
- If you modifiy a slot from 'Booked' to any other status, the appointment will be cancelled, but there will be no email notification neither to you nor the customer.
- BEWARE: duration is in number of 30 minutes slots. 30 minutes should be 1, 60 minutes should be 2, etc.
- You can modify the appointment location here, too.
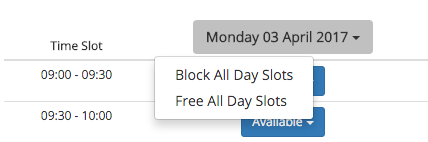
Modify Day Slots
You can modify all slots of a given day in one go by clicking on the arrow beside the day (top of the schedule):
- Block all slots for the whole day.
- Free all slots for the whole day.
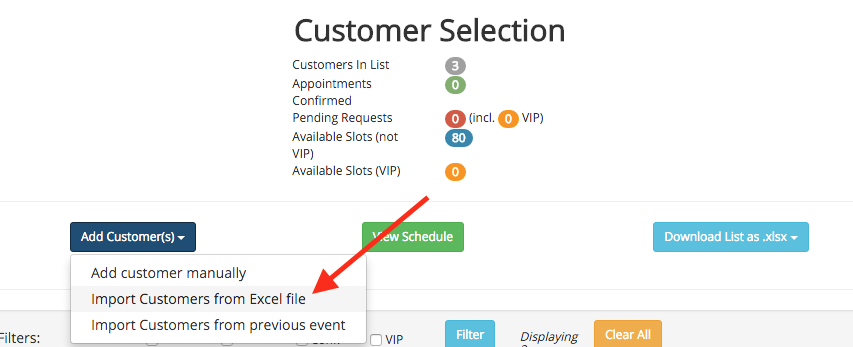
Customer Selection
Customers must be added to your Customer Selection before having appointment requests sent to them.
Import Customers From Excel: prepare your list
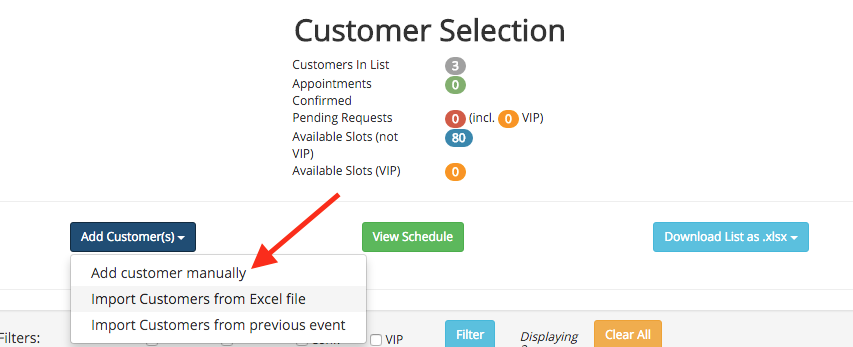
- Click on 'Add Customer(s)' button on the top left, then 'Import Customers from Excel file'
- On the second screen, click on 'Download Template'.
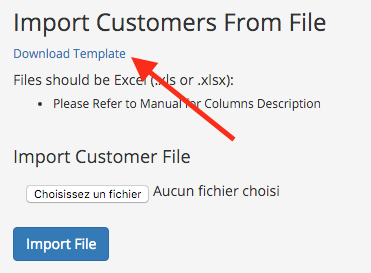
Please use this template to fill in your customer selection. Each line is a new customer.
Columns Description: Red columns are required
| Column Name | Description |
|---|---|
| user_email |
Email of the attendee Please enter the email address only. Avoid characters such as < or > |
| user_first_name | First name of the attendee |
| user_last_name | Last name of the attendee |
| company | Company of the attendee |
| duration |
Duration of the requested appointment. 1 for 30 minutes, 2 for 60 minutes, 3 for 90 minutes, etc. |
| can_access_other_team_schedules | If the attendee can access other team's schedules: type TRUE in the cell, otherwise leave blank. |
| Vip | VIP attendee can access special slots, which are only available for VIPs. Type TRUE in the cell, otherwise leave blank. |
| delegate_attendee_email | If there is another person than the attendee who arranges appointment for the attendee, it is a delegate_attendee. Type the email of the person in charge of arranging the appointment. |
| delegate_attendee_first_name | First Name of the delegate_attendee |
| delegate_attendee_last_name | Last Name of the delegate_attendee |
| delegate_attendee_company | Company of the delegate_attendee |
| delegate_attendee_is_agent | If the delegate_attendee is an Agent : type TRUE in the cell, otherwise leave blank |
| can_modify_location | If you want your attendee to be able to modify the appointment location, type TRUE in the cell, otherwise leave blank |
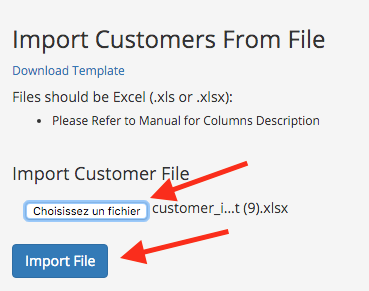
Import Customers From Excel: upload your list
From the 'Import Customer from Excel' screen, select your customer file (button) and click on 'Import File'. This may take a few seconds, don't hit reload or back on your browser.
Manual/Individual Customer Import
Click on 'Add Customer(s) then 'Add Customer Manually' to import customer one at a time
On the next screen, please enter the email address of the customer to be imported.
If the customer already exists in our database, no other information needs to be entered.
If the customer does not exist in our database, please enter first name, last name and company name.
Import Customers from Previous Event
This function imports all customers from a previous event customer selection.
Select the previous event and your whole customer selection will be imported to the new current event.
About Excel Import in Beta Version
LaBase RendezVous will successfully import from your Excel list most of the times. However, bugs may appear at import stage:
- An Import Message will appear on the top of the page after you have clicked on 'Import File' button. This will show how many rows were read and how many customers were imported.
- You may encounter an ugly 'Something Went Wrong' screen while importing, and we're sorry about this. If that happens, please contact us. We'll assist you as fast as we can.
About 'Selected' Status in your Selection
TL;DR: The Selected status does not change anything so far. This is for a future feature.
If you add a customer manually or with the excel import function, the imported customers in your list appear as 'not selected'.
This status (selected or not) does not modify any behaviour of actions (for the time being). This will be used later, when 'unknown' schedulers will import customers, so that we can check them first.
So you can leave the customers unselected, but it's better to select (approve) them after adding/importing. To do so, either select the check box next to the customer in the list and click the 'Select Checked Customers' at the end of the page. Or you can use the All/None checkbox.
About First Name, Last Name of Customers and Company Names
LaBase RendezVous automatically recognizes emails from people who have already used our website.
This means that if you import or add an email address that is already registered in our database, we'll use the First Name, Last Name and Company Name that we have previously recorded.
While this assures you that information is precise and continuously maintained, this info may sometomes be wrong. If you spot a mistake, please let us know and we'll correct.
About The Customers You Are Importing
LaBase RendezVous will not be helpful if you request appointments from customers whom you don't know at all. It is not a mass-mailing tool. We monitor accuracy of emails and open rates for all of our users, and may warn you if too many of the requests you are sending are not delivered or not opened. We all hate spams, so please don't spam through our website. This is very important to us.
Appointment Requests
Before Sending Appointment Requests
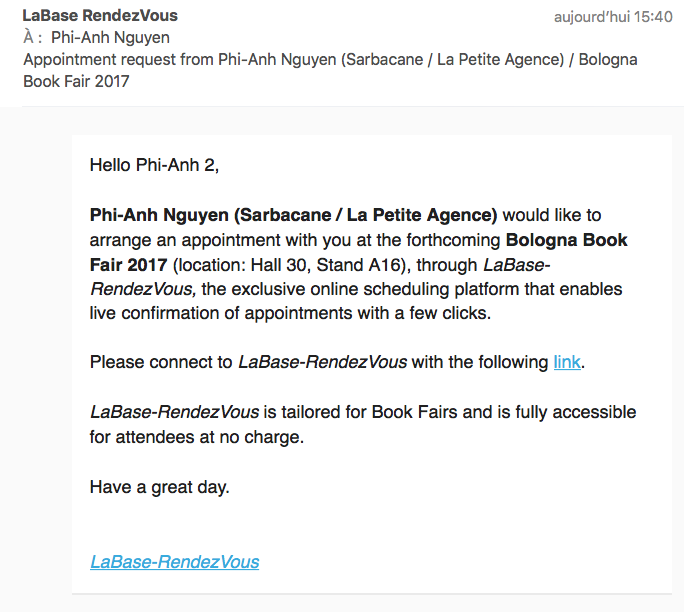
Appointment requests emails are sent by the website. The 'From' address is scheduler@labase-rendezvous.com
One of the rare issues you might run into is that this email goes into the Spam folder of the attendee. However:
- In the past year of testing, a very small proportion of customers received the email in their Spam folder.
- As the customer base grows, this will even reduce the risk of going into Spam.
One recommended way of avoiding spam filters is to warn your customers that they are going to receive an automated appointment request. So before hitting the 'Send Request' button like a maniac, you can send an email to all of your customers saying that they are shortly going to receive an appointment request from LaBase RendezVous, from the scheduler@labase-rendezvous.com address.
Send Appointment Requests
To send the appointment request email to Attendees, click on the green ‘Send Request’ button.
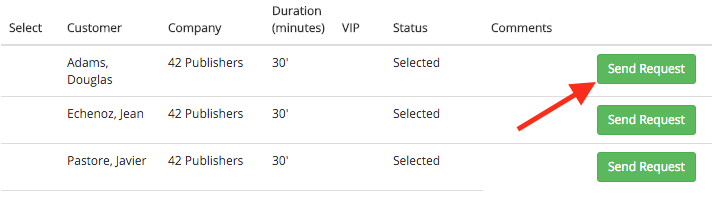
A pop-up will appear and when the email is sent, a message will show at the top of the page confirming the email was sent. If there is a delegate attendee, the message will indicate the email was sent to Delegate.
In the Comments column, the date and time of the last request is shown, as well as the number of requests sent.

[ The appointment request email model is standard for everyone so far. Feature in development : customizing the email request. ]
The Standard Appointment Request looks like this:
Customer Selection Other Features
‘Reconfirm’ button: send an email to the Attendee with a confirmation of the appointment. Only works if there is already an appointment confirmed.
‘Duplicate’ button: duplicates the customer, for multi-slots during the same event. To be used for instance for Agents, for which you want multiple (non-consecutive) appointments, if you don’t know from the beginning with which publisher you will have the meeting with.
[ Feature to be developped: after appointment is confirmed, modify the customer ; or indicate publisher + agent ]
‘Edit’: Enables the Scheduler to modify the Customer’s information for this event : VIP status, duration, delegate attendee email, etc.
‘Decline Manually’: If a customer has declined the request without using the website 'decline' button, you can save this information by clicking on this function.
‘Delete’: This will delete the customer from your selection. Please use with care.
‘Show Customer Profile’: Displays the customer information, including their sign-in count and last sign-in, which indicates whether the customer has logged into LaBase RendezVous further to an appointment request.
Export Features
Schedule Export
In the 'View Schedule' screen, click on 'Download Schedule as .xlsx'.
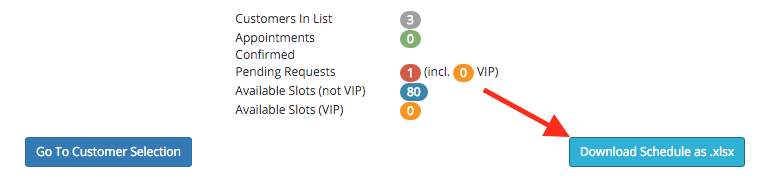
Format is Excel, so that you can modify the schedule manually, if needed
Customer Selection Export
In the 'Customer Selection' screen, click on 'Download Schedule as .xlsx'.
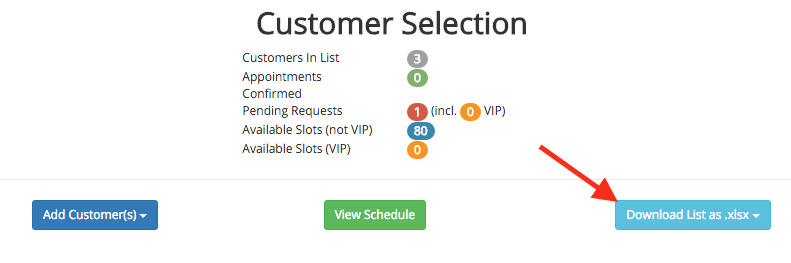
If you are part of team (as configured by Admin), you will have the choice between Individual Customer Selection, or Team Customer Selection (all customers from everyone from the Team).
Need more help?
We're here to help, so please do not hesitate to write to us at this email.